I was looking through old catalogs looking for inspiration for current sets.
In the Spring/Summer 2009 Catalog on page 87, I saw a box that I liked.
I did not make it exactly like the one in the catalog, but it was my inspiration.
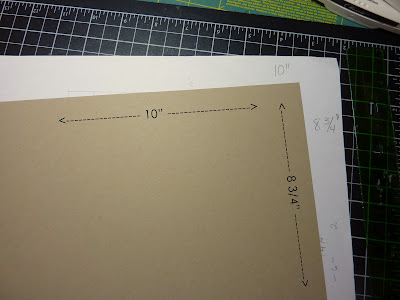
Start with a 10" x 8 3/4" base
With the 8 3/4 edge at the top of your simply scored board,
make a score line at 2" & at 6 3/4"
Turn the card stock so the 10" edge is at the top of the score board,
score at 2" & 8"
Be sure to snip along the score line & use your bone folder to create the folds
Use a 2nd piece of cardstock cut at 7" x 6 1/4"
With the 7" side at the top of your scoreboard, score at 7"
Turn the cardstock so your 6 1/4" side is at the top of the scoreboard.
Working down from the previous score line, you want to make a score line 2" long and 1/8" in from each side. This will create the lid.
Cut away the 1/8" x 2" bits at each side. This part will attach to the box base and create the lid.
Cut another piece of CS at 5" x 6 1/4"
This will be the finishing piece for the lid.
On both lid pieces you will need to create a window by removing the center portion,
leaving a 1" border all around.
Your three pieces should look like the picture above at this point.
Place good strong adhesive on the flaps on the base of the box
Attach flaps
Apply adhesive to the flap of the lid that will adhere to the base box
Attach flap to the inside of the box
Apply adhesive to the window sheet or any type of clear plastic material (it should have some strength and weight to it - not like plastic wrap or a baggie)
Attach to the top of the lid base.
Apply adhesive to the outer rim of the 2nd lid piece.
Carefully adhere to the top of the lid, you want to be sure your edges all line up.
You will have the window sheet sandwiched between the two top pieces.
There you go!


1 comments:
I am so glad you shared this in photo detail, with measurements. What a beautiful way to share your pretty cards as a gift.
Post a Comment
Note: Only a member of this blog may post a comment.